Hey guys, In this blog we will be discussing about Li-Fi toll system based on STM32.
The project design is based on two main parts -A Transmitter and a Receiver.
The Transmitter will consist of two main components:-1) Laser and 2) The STM32 Microcontroller itself.
The receiver section will consist of three components:-1) LDR Module to Detect the Light 2) The STM32 Microcontroller and 3) Servo motor for the Toll itself.
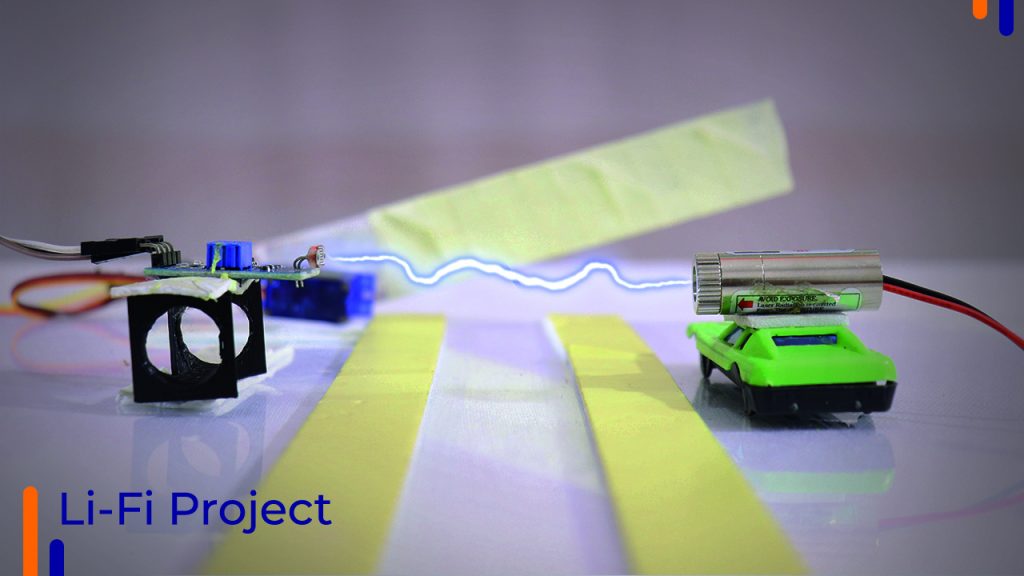
The final output of our project will look something like this.

Let’s talk about it’s working now. A LiFi System uses light to send wireless data embedded in its beam and that’s what we did in our project.
Connection Diagram for Transmitter.
Code for Transmitter.
#define LED_PIN PB8


int time=70;


void setup()
{
  pinMode(LED_PIN, OUTPUT);

}

void loop()
{

  digitalWrite(LED_PIN, HIGH);
  delay(time);
  digitalWrite(LED_PIN, LOW);
  delay(time);

}
The value of variable time int in “int time =70” describes the identity of a car. Whether the Car will be Car5 or Car6 or any other car will depend solely on this value. This time variable is the delay between each consecutive blink of the laser.
Connection Diagram for Receiver
Code for Receiver.
#define LDR_PIN PA0

#include <Servo.h>

Servo myservo;

bool previous_state;
bool current_state;
int car5bal=100;

void setup()
{
    Serial.begin(9600);
    pinMode(LDR_PIN, INPUT);
    myservo.attach(PB8);
}

void loop()
{
  unsigned long duration = pulseIn(LDR_PIN, HIGH);
  Serial.println(duration);
  Serial.print("car5balance");
  Serial.println(car5bal);

  if (duration > 4000 && duration < 8000)
  {
    Serial.println("Car1");
  }
  else if (duration > 10000 && duration < 17000)
  {
    Serial.println("Car2");
  }
  else if (duration > 30000 && duration < 37000)
  {
    Serial.println("Car3");
  }
  else if (duration > 37000 && duration < 40000)
  {
     Serial.println("Car4");
  }
  else if (duration > 40000 && duration < 60000)
  {
    Serial.println("Car5");
    car5bal=car5bal-10;
    myservo.write(0); // sets the servo position according to the scaled value
    delay(10000);
    myservo.write(180);
  }
  else if (duration > 65000 && duration < 70000)
  {
    Serial.println("Car6");
  }
  else if (duration > 70000 && duration < 77000)
  {
    Serial.println("Car7");
  }
  else if (duration > 80000 && duration < 87000)
  {
    Serial.println("Car8");
  }
  else if (duration > 90000 && duration < 97000)
  {
    Serial.println("Car9");
     }
  else if (duration > 100000 && duration < 107000)
  {
    Serial.println("Car10");
  }
  else if (duration > 110000 && duration < 117000)
  {
    Serial.println("Car11");
  }

}
Through the PulseIn function, we will record the duration of the delay. After recording the delay, we will analyze the range duration of the delays with the help of the if-else condition.
That’s it, guys. Thank you for reading the blog.